Info Baadsah: BLOGGING
Showing posts with label BLOGGING. Show all posts

Thursday, January 17, 2019

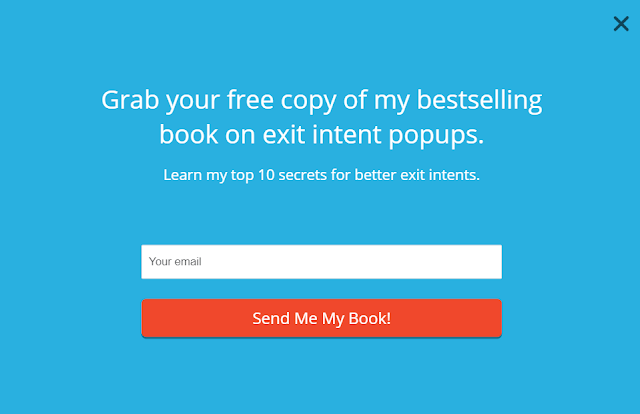
How To Add Free Pop Up Email Subscription Box In Blogger
January 17, 20190 Comments

A Wonderful Free Full Screen E-mail Subscription For Your Blogspot Blog.


Getting more subscriber is really a big dream for every blogger and pop-up subscription bx is really important for getting that dream into reality. Here in this article we are gonna show you hoe to add a full screen popup subscription box absolutely for free with just in a few step.

1. Only you have to do is to go ta a website called Hellobar
2. Create a free account there.
3. Click on "Create New Popup" option

4. Then Click on "Collect Email" option

5. Then head to "Page Takeover" option

6. Then Choose a template and design as you like.
7. Lastly when everything done click on "Save & Publish" option in right side corner and click on html option.

8. Copy the shown text and paste it in your HTML widget and save.

Hope this will help..........please subscribe us to get more blogging tricks.......Thanks
Reading Time:

Tuesday, January 15, 2019

How To Add Text Box In Blogger Post
January 15, 20190 Comments
How to add simple text box in blogger post.
Putting a simple text box within blogger post will really helpful for those who trying to paste some codes within there post. It a very important tool for pasting a code within the post.

Why and when we need a Text Box
Sometimes there may be requirement of pasting codes which is a part of your article and you don't want it to be mixed with your article. You just want it to show specially and in a way so that it will be easy for the reader to find and copy the code, for which you are writing the post.

Prcedures:-
Important:- If it is possible then use the code before writing the post so that it will be easy for you to know where to paste the code.

1. Login to your blogger account.

2. Click on post option in left side bar.

3. Click on HTML option just beside the compose option.(See Image)

4. Copy the below mentioned text and paste it HTML post editor just after <br />

<textarea cols="50" rows="5"></textarea></div>
</div>

5. Change the "cols" & "rows" no to increase and decrease the width and height

6. Again click on compose option and start writing your post.

Reading Time:

Wednesday, February 8, 2017

Stylize or customized read more key in blogger
February 08, 20170 Comments

Default Blogger styling of read-more button can look a bit boring and unnoticeable tho, so in order to take the most out of this new option in your posts, I created a quick styling update for you all. Simply go to CUSTOMIZE->ADVANCED->ADD CSS and paste in this code:
.jump-link {
 text-transform: uppercase;
 margin: 0 auto;
 font-size: 14px;
 letter-spacing: 2px;
 text-align: center;
 padding-top: 30px;
}

.jump-link a {
 border: 1px solid;
 padding: 10px;
}
The above code will render your read more link as this:
read more, blogger button, adding read more, styling read more
It looks way more professional, doesn’t it? You can also change the text of the read more >> into anything you’d like! Simply go to LAYOUT-> Select Edit on Blog widget-> find an option to change Read More text.
And also change the color.... just replace solid in to color name
Simple as that!
Let me know if you give this a try friends!
Reading Time:
19 Useful Keyboard Shortcuts for Blogger Post Editor
February 08, 20170 Comments


SHORT-CUT KEYS FOR BLOGGERS
Bloggers always look for new tricks and tweaks related to blogging and we keep on helping you in that by sharing some of the awesome tricks and tweaks of Bloggers. Keeping the same trend on, we are sharing some useful keyboard shortcuts which not only save your time but would make the job lot easier. These keyboard shortcuts will help you out in easing your work and you can perform different sort of task in seconds with the help of these keyboard shortcuts. In this article, we will show you 19 useful keyboard shortcuts for Blogger post editor.


So, here are the list of these awesome keyboard shortcuts which you can use on Blogger and ease out your work. We all know that keyboard shortcuts let us to perform different task without wasting much time and that is the reason we are sharing this list here for you in order to save your time. And, we all know that in blogging, “Time is Money”.


ShortcutsFunction & How to Apply
Ctrl + CIt will copy the selected text. First select the text and then apply the shortcut.
Ctrl + VIt will paste the coped text.
Ctrl + ZIt will undo the deleted or erased text.
Ctrl + YIt will redo the undo text.
Ctrl + XIt will redo the undo text.
Crl + BIt will bold the selected text. Select the text and then apply this shortcut.
Crl + AIt will select the complete page.
Crl + SIt will auto-save your post and you can keep on editing at the same time.
Crl + UIt will underline the selected text. First select the specific text and then use this shortcut.
Crl + IIt will italicize the selected text. First select the text and then use this shortcut.
Crl + KIt will insert hyperlink to selected text. First select the text and then insert the link into it.
TabIt will change the bullets into sub-bullets.
Tab + ShiftIt will add levels between bullets and levels, (Use to remove the bullets or numbers). First select the text and then use this shortcut.
Ctrl + FIt will give you a search which you can use to find any phrase oe sentence in your post.
Ctrl + Shift + MIt will convert your Blogger Post Editor to Mobile View.
Ctrl ++ (Press + Twice)It will zoom in the blogger post editor.
Ctrl -- (Press - Twice)It will zoom out the blogger post editor.
Ctrl + 0It will change the screen to default size.
Ctrl+Shift+VIt will paste the copied item without formatting.


So, this was the list of 19 useful keyboard Shortcuts for blogger post editor, we are sure that this would have been proven helpful for you guys. We have updated this list by including some of the new shortcuts and we personally have checked all these shortcuts before sharing them with you.

If you have any other shortcut to share which we have not included then share them in the comment box. Your share would be helpful for our readers out there.
Reading Time:

Thursday, January 12, 2017

How To Design a Blog Template
January 12, 20170 Comments
How to Design a Blog Template
Learning how to design a blog template can take time as well as experience working with HTML and  website

design. The blog template that you select is a direct reflection of you. It is the first impression that visitors have of your blog, so having a professionally designed template should be a top priority.

Templates to Choose
Choosing the right template is important, but it does not always require spending a lot of time slaving over the computer in order to design it yourself. There are a number of free blog templates available that can be used on most major blogging networks and systems, including Blogger and WordPress. Keep in mind that free templates may be in use by a variety of people, which means they are not unique to you.
Free templates are available from various sources. WordPress and Blogger offer a variety of their own templates to choose from. Other sources include these. 


Another option is to consider purchasing a blog template designed specifically for you by an expert. Professional designers can create some of the best templates
available. They often provide you with the most flexibility since they have an outstanding number of skills to help you with. On the other hand, you do have to factor in cost.

One company offering these types of blog templates is Template Monster. While designing your own template may be your goal, consider using professional services, too. They could provide that professional image you are after.

How to Design a Blog Template on Your Own
Individuals looking to design their own blog templates have a variety tools available to help them. Understand basic HTML, and be sure that you understand the process of website design. The other important element is to be creative. Some of the best blogs today, that people return to repeatedly, are highly creative, interesting and unique.
Getting Help For those who would like to learn the process of creating a blog template in a step by step fashion, there are some excellent tools available to do so. You can use these tutorials to help you learn how to design the template shown, although you can also change the formulas enough to create your own, unique template.

1. Photoshop Support: For those who are using Photoshop, the Photoshop Support Tutorial is a good tool to use. It gives specific directions and answers questions you may have.

2. Our Blogger Template: This is another good resource for  those looking to design a blog template. OurBlogTemplates.com provides good information in a simple to follow manner and is great for Blogger.

Blog Template Software
There are a number of software products available that can help you to design your blog template. Choosing the right one for you depends on preference or what resources are immediately available.
Adobe Creative Suite is an option for many blog template designs. Design tools are top of the line with this product.

Microsoft Expression Software is a fantastic tool for those wanting to create a complete, thoroughly unique blog. It will provide you with the most tools available to design your blog template.

CoffeeCup.com Designer is a good option for blog creation, especially if you would like a low cost option. It does not require any experience in website building either, which helps to simplify the process considerably.

4 Rapid Weaver 4 is a good choice for those using a Mac operating system.

5 Windows Live Writer is another good choice. What makes it great is that it is an offline tool. Some experts believe that having all of your blog design online can be troublesome, so this software product is useful.

When it comes to how to design a blog template, there are many great tools available to help you through the process. Do as much, or as little, of the work you would like to yourself when creating your blog. The only aspect that should consume your time is finding a template that allows you to be as unique as you would like to be.
Thanks.................
Reading Time:
1000+ FREE XML Blogger Templates Download Websites
January 12, 20171 Comments
Download template for Blogger:-

Blogger is one of the easiest platforms to install new templates. Many bloggers change their format several times before deciding upon one that they really like. The popularity of the Blogger platform resulted in the formation of a huge community of template designers who are so proud of their creative effort that they offer their templates for free. Every year, as the Blogger user base increases, there are also more free XML Blogger templates available throughout the web.

Websites for High-Quality Free Templates

As with most things that are free, quality sometimes suffers. If you blindly search the web for free Blogger templates, you'll discover thousands of sites that offer a variety of offerings. These range from ugly and poorly functioning templates to beautiful and wonderfully useful templates. XML style programming is an art form, and it's easy to recognize high quality templates when you find them. The following list represents some of the best free XML Blogger template resources on the web:
bTemplates: is the king of the hill when it comes to free XML code for Blogger layouts. Few other directories match the volume and selection of bTemplates.


B Templates:, a "copycat" site of bTemplates (in name only) offers a short list of Blogger templates that may be few in number, but they are also quite high in professional quality.


FinalSense: Provides pages of very nice, free XML blog templates categorized by either format (3 or 4 column) or by subject.

Offering no fee for shipping if customers purchase a certain number of items.


Mashable: lists dozens of other directory sites and blogs that archive available free layouts.


PsycHo.org: is one of the most innovative and creative free online tools available for Blogger users. This application lets you define header information, sidebar widget information and schemas and all kinds of other details about the template using a very simple point and click interface. When you're done, the tool produces the XML code that you need to transfer your automatically generated design to your own blog.

OTHER WEBSITES ARE:-

1. gooyaabitemplates
2. colorlib
3. mybloggerthemes
4. themexpose
5. soratemplates
6. deluxetemplates
Reading Time:
How to Install XML Layouts file in Blogger
January 12, 20170 Comments
While not as popular as WordPress, the best thing Blogger has going for it is its ease of use. With virtually no computer skills, you can install any of the free XML templates available at the sites above onto your blog in just a few clicks. The following instructions assume you are using the "new" Blogger interface, which lets you select an XML file and installs the code for you.

First, in Blogger, click on the "layout" tab, then the "Edit HTML" tab, and the "Save Template" button. Save this file to your computer, as it will be your backup if anything goes wrong with the new template.

Download an XML file from any of the sites above to your computer.

Back on the "Edit HTML" screen, click the "Browse" button and select the XML file that you downloaded from one of the free template sites.

Another option is to open the file, highlight the code and paste it into the text box and save.

Once you've finished the procedure above and you've saved the changes, the next time you view your blog it will feature the new design. However, before you install a new template, make sure you understand that all of the widgets and tools that you added to your previous layout will be lost, and you'll have to install all of them again. This includes any Adsense code, counter widgets or social network feeds like Technorati or Digg.

Ideal for Small Blogs

Opting for a free design may not offer the widest selection or the highest quality blog designs, but it does provide you with enough variety and features to satisfy anyone who is only blogging on a small or moderate scale. If you ever intend to grow to the level of a professional blog with sponsored ads and constant content updates, you'll eventually want to consider purchasing a professionally created template design.
Reading Time:

Wednesday, December 28, 2016

How to add META TAG in blogger
December 28, 2016 4 Comments

How to add Meta Tag and Keywords in Each Blogger Post

Meta tags or keywords are very significant SEO terms. To find your site’s rank better in search engine, you have to add meta tags or keywords in every page of the website. But when you want to put keywords in every blogger posts, you can’t because there is only meta description place in blogger. There you cannot find keywords adding space. So if you want to add meta tags or keywords also, you have to add some codes on your template. Meta tags are also as important as meta description. Meta tags help you to increase healthy and better traffic.

Process of adding meta tags in each blogger post:-


Suggestion: We always recommend you not to change any code of your template with keeping back up of your template.


Step 1. Log in into your blogger.


Step 2. Choose your one blog.


Step 3. Go to template>>edit html.


Step 4. And find the code <b:include data='blog' name='all-head-content'/>


Step 5. Then paste the below codes below the above code.


<b:if cond='data:blog.url == "PAGE-URL"'>

<meta content='PAGE-DESCRIPTION' name='description'/>
<meta content='PAGE-KEYWORDS' name='keywords'/>
</b:if>
Step 6. Now you have to paste the above code every times when you posts.


Note: If you have 20 posts, you should copy and paste the above code 20 times too.

Step 7. Click on Save template button.

Note:-
1. write the url of your post in PAGE-URL.


2. Write meta description in PAGE-DESCRIPTION.


3. Write meta keyword in PAGE-KEYWORD.
Reading Time:
How to submit your URL to Google, Bing and Yahoo
December 28, 20160 Comments
How to submit your URL to Google, Bing and Yahoo – Add your website


Every site needs to get ranked in search engines, but before that a website must first get indexed in search results. Search engines are smarter and they crawl your site once it is live. Still many new sites struggle to get indexed. To get faster and better index your site you must submit your URL to Google, Bing and Yahoo.

How to submit your URL to Google – Add your website

Submit your site to Google and it crawls and adds new site to index and also updates existing sites. So if you have any new blog posts that are not listed in Google then you can submit your URL to Google.

Go to this URL Google site submit and it will take you to Google webmaster tools submission page
  1. Login with your Gmail account and add your Home page URL, enter CAPTCHA and click “Submit request”.
Now your request will be processed and your site gets indexed shortly in Google search results.
Note: Only submit top level directories that is your home page (http://website.com) and Google crawls the rest of your pages.

How to submit your site to Bing – Add your URL

The process is same for what you done for Google. Go to Bing site submit and add your home page URL (http://website.com), enter CAPTCHA and submit your site. Now your site will be soon included to Bing.

How to submit your site in Yahoo – Add your URL

Go to Yahoo site submit Yahoo site submit and click “submit your site for free”. It will take you to Bing webmaster tools. Login with you Microsoft account and at the right side in dashboard click “add a site”.
This is how you submit your URL to Google, Bing and Yahoo. Be patient and your site will be soon added to index. Don’t spam and submit your site using any automated software’s.
Reading Time: